Fabric Data Pipeline Activities: A Practical Guide

Happy New Year, readers! 🎉 It’s a joy to start 2026 with all of you and I’m excited for all the learning we will share this year.
In today’s data-driven world, organizations are increasingly reliant on agile, scalable, and robust data pipelines to deliver actionable insights. Microsoft Fabric, with its unified analytics platform, provides an end-to-end solution for orchestrating, transforming, and delivering data efficiently.
In this article, we will walk through several Fabric pipeline activities, demonstrating their configuration, practical use cases, and outputs. Each activity is presented with hands-on examples.
Here’s what we’re covering:
- Get Metadata Activity
- Outlook Activity
- Teams Activity
- Dataflow Gen2 Activity
- Data Warehouse Activity
- Lookup & ForEach Activities
- Stored Procedure Activity
Each section is self-contained, so you can jump to the specific activity you need or follow the entire guide sequentially.
Before we dive into each activity, it’s important to understand that Fabric pipelines are built to be modular, dynamic, and scalable. Each activity represents a fundamental units of work within a data pipeline. They define tasks such as moving data, transforming it, or controlling the flow of execution.
Whether you’re designing end-to-end ETL/ELT workflows, automating notifications, or performing complex transformations, understanding the role of each activity, and how they interact, is key to building robust and maintainable data pipelines.
Get Metadata Activity
is used to inspect information about data without loading it. You can retrieve properties such as file existence, size, structure, and schema details.
In simple terms, metadata is information about your data. It doesn’t contain the data itself, but tells you what’s inside and how it’s structured.
For a table: Metadata can tell you how many columns the table has, the table’s schema or script, and whether the table exists.
For a file: Metadata can include the file type, number of columns (for structured files like CSV), and whether the file exists.
For a folder: Metadata can indicate whether the folder exists and how many files are stored inside it.
Let’s Demo
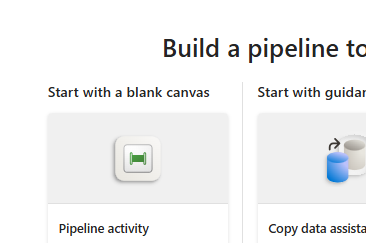
In my Fabric portal, I first navigate to the FabricSeries workspace. From there: I click + New Pipeline to create a fresh pipeline.
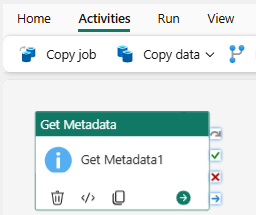
I drag the Get Metadata activity onto the canvas.
So using get meta data, you can get metadata of a table and file from a lakehouse, warehouse and external sources.
In the field list click NEW, in argument you can see I have column count: which finds out how many columns in a table, Exists: you can use exist to check whether my table exists or not, Structure: check the structure of your table, and add dynamic content.
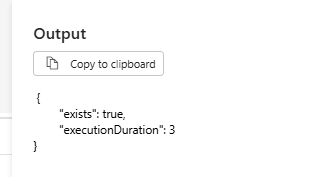
For this demo, I selected the “exists” option. Next, I navigated to Home, clicked Save, and then Run.
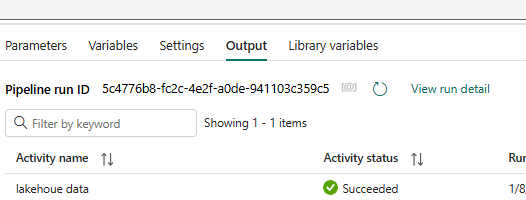
The pipeline executed successfully. The output is shown below.
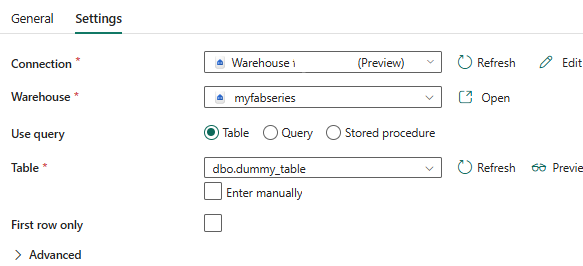
Our next example demonstrates how to check metadata for a Data Warehouse. Navigate to the workspace and set the data stored type to Data Warehouse. Select the target Data Warehouse, and then click Edit to configure the dataset and retrieve its metadata.
Next, I will intentionally provide a pseudo schema name (dbo) and a table name (dummy_series). I then click New and select the argument EXISTS. Since this table does not exist in my data warehouse, I expect the output to return false. After configuring, I click Save and then Run the pipeline. Let’s now review the output.
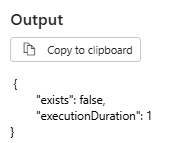
Since this table does not exist in my data warehouse, I will use the output of the Get Metadata activity to create a table using Condition activity and Script activity
If Condition activity
Now, let’s walk through how the If Condition activity works in a pipeline. This activity helps us checks whether a condition is true or false.
First, click Add dynamic content in the Condition activity.
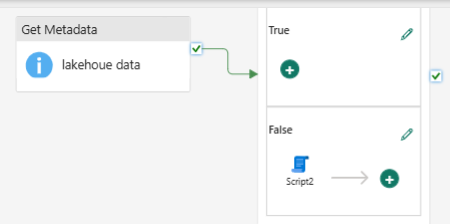
Select the output from the Get Metadata activity, and then choose the “Exists” property from the Lakehouse activity. Since our table does not exist, this will evaluate to false.
Next, we handle the False branch:
1. Drag a Script activity under the False path.
2. Connect it to your workspace and select the Data Warehouse.
3. Use the Non-query option and enter the SQL to create your table. For this demo, we’ll keep it simple: CREATE TABLE dbo.dummy (col1 VARCHAR(10));
When we run the pipeline, Fabric will first check if the table exists. Because it doesn’t, the Script activity will create the table automatically. Once the pipeline completes, we can inspect the outputs to confirm that the table has been successfully created.
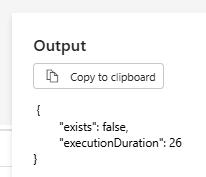
In the Get Metadata activity, the output returned false, indicating that the table does not exist. Under the False branch of the Condition activity, we have configured a Script activity to create the table. To verify that it worked, we can check our Data Warehouse and confirm that the dbo.dummy table has been successfully created.
Outlook Activity
The next activity we’ll explore is the Output activity which enables you to send automated emails as part of a pipeline run, using your Outlook account.
Configuring the Outlook activity:
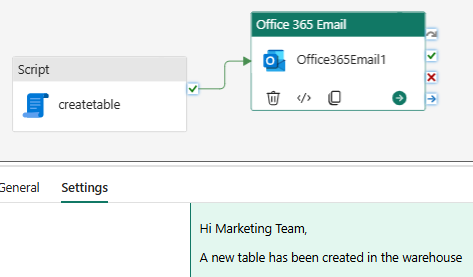
Drag the Script activity onto the pipeline canvas and then drag Outlook.
Click on Outlook activity and map it with script activity.
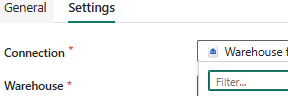
Next, go to the Settings tab and sign in to your Outlook account to authenticate the activity.Authenticate using your Office 365 account, and configure the To, Subject, and Body fields. You can use dynamic content to include pipeline variables, like the number of files processed or table status.
Save and run the pipeline to automatically trigger email notifications based on the workflow.
Note: When you deploy pipelines across environments, Outlook connections might require re‑authentication in the target workspace.
Teams Activity
Next, we’ll explore the Teams activity, which allows your pipeline to send messages directly to Microsoft Teams channels.
Configuring the Teams activity:
- Drag the Teams activity onto your pipeline canvas and connect it to the preceding activity whose output you want to report.
- In the Settings tab, authenticate with your Microsoft Teams account.
- Select the Team and Channel where you want to post the message.
- Save and run the pipeline to verify that messages are sent successfully to Teams.
N/B: This activity enables pipelines to communicate results in real time, making monitoring and collaboration seamless for your team
Dataflow Gen2 Activity
lets you define transformations using Power Query that can be reused across pipelines. It’s a compute environment designed to handle data cleansing, joins, pivots, and other transformations before loading to destinations like a lakehouse or warehouse.

In the example above, we’ll use Dataflow Gen2 to ingest data from an OData source, and load the data into a Lakehouse.
• In your Fabric workspace, click New and select Dataflow Gen2. This opens the Power Query editor, where you define how data is ingested and transformed.
• Click Get data and choose OData as the source type. Provide the OData endpoint URL and authenticate as required.
• Pick the target Lakehouse and define the destination table. Fabric will automatically create or map the table based on the schema defined in the dataflow.
• Save the Dataflow Gen2 and run it to execute the ingestion and transformation process. Once completed, navigate to the Lakehouse and verify that the data has been loaded correctly.

The pipeline activity completed successfully as illustrated above. The notification email sent via Outlook is shown below.

Loading Data from Azure Blob Storage to Fabric Data Warehouse Using Copy Activity
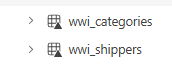
For this demo, we will use the Wide World Importers (WWI) sample dataset repository provided by Microsoft to load data from Azure Blob Storage into a Microsoft Fabric Data Warehouse.
The WWI dataset contains multiple dimension and fact tables. As part of this demonstration, we will load selected dimension tables, specifically Categories or Shippers , into our data warehouse.
Create a Copy Data Activity
- Navigate to your pipeline and click Add pipeline activity.
- Select Copy Data.
- Provide a meaningful name for the activity (for example, Copy_WWI_Shippers).
Configure General Settings
- Timeout: Leave this at the default value unless you have specific performance requirements.
- Retry: For this demo, I’ll set the retry count to 2.
Expand Advanced settings:
Retry interval: Set to 30 seconds.
Secure input/output: When enabled, input and output details are not written to logs.
For this demo, leave both options unchecked to allow visibility during execution and troubleshooting.
Configure the Source (Azure Blob Storage)
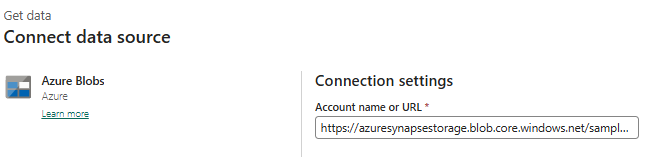
- Under Source, select External.
- Click New connection
- Choose Azure Blob Storage using this URL
- Click Create, once the connection is created, you will see a confirmation message.
- Click Test connection to validate connectivity.
Specify the Source File
Container: sampledata
Directory path: WideWorldImportersDW/tables
File name: WWI_Shippers.parquet
File format: Select Parquet
This directory contains multiple WWI tables organized by folders. For this example, we are targeting the WWI_Shippers.parquet file.
Configure the Destination
- Navigate to the Destination tab.
- Select Workspace as the destination type.
- Choose Data Warehouse and provide your target data warehouse name.
- Enable Auto-create table.
Specify:
Schema name (for example, dbo or dim)
Table name (for example, DimShipper)
Save and Run the Pipeline
Once the pipeline execution is complete, the data will be available in the Data view as seen above. You can read and validate the data from this view by executing SQL queries.
How to DROP TABLES using the Lookup Activity in Fabric Pipelines
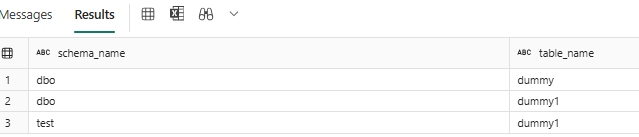
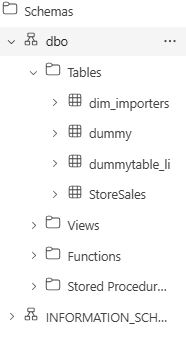
In this demo, we want to drop three tables (as seen below) from our data warehouse without doing it manually, one by one. We can automate this using a combination of Lookup, ForEach, and Script activities in Fabric.
Step 1: Use the Lookup Activity to Read the Table
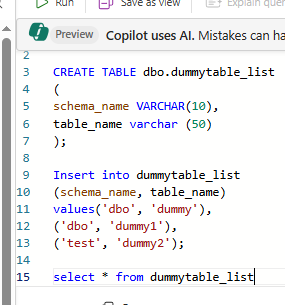
The first step is to read the metadata table that contains the list of tables we want to drop. This table will store the schema name and table name for each table.
Create the LookUp table & Insert Table Metadata in your warehouse to hold the list of tables to drop as seen in the image below.
Configure the Lookup Activity
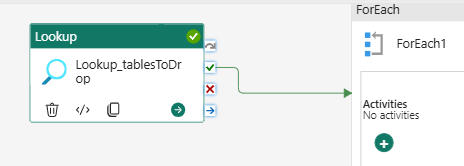
On the pipeline canvas, drag a Lookup activity and name it, e.g.,
Lookup_TablesToDrop.Configure the source:
- Dataset: Select the
TablesToDroptable.
Do not check “First row only” , we want the Lookup activity to return all rows, because each row represents a table to drop. If you don’t uncheck it, you won’t have the value array on the dynamic content output
This ensures the ForEach activity iterates row by row through all tables.
Add a ForEach Activity to Loop Through Tables
Drag a ForEach activity onto the pipeline canvas.
Next, we will map the Lookup activity output to the ForEach activity so that we can iterate over each table dynamically.
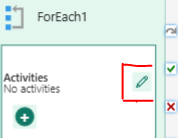
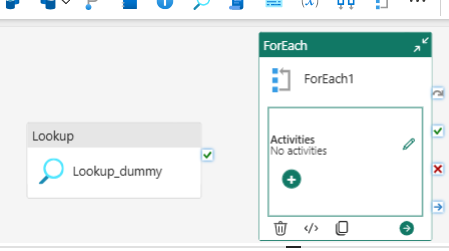
Select the ForEach activity edit icon on the canvas as seen below.
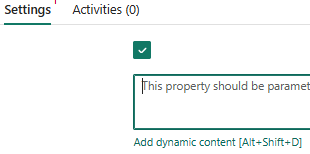
In the Items field, we need to pass the output from the Lookup activity:
Click Add dynamic content. From the list, select the Lookup output array (this contains the rows from your TablesToDrop table, including both SchemaName and TableName).
Next, click on Connection and select your target data warehouse. Then, choose the Non-query option. We use Non-query here because our goal is to execute DROP TABLE statements. The Query option is only required when performing operations that return data, such as SELECT, or when creating objects, such as CREATE TABLE or CREATE SCHEMA. And in case of DML statement, we always use non query.

We cannot simply write a static DROP TABLE statement in the Script activity because the tables to drop are dynamic, coming from the Lookup activity. To handle this, we need to use dynamic content. Click on Add dynamic content, and enter the following script to drop each table as seen below
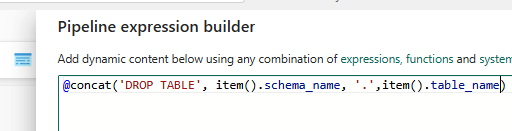
The Concatenate function is used to dynamically build a single SQL statement, such as DROP TABLE, by combining the schema and table names from the Lookup output. Once the script is configured, go to the Home icon and click Validate to check the pipeline for any errors. After validation, click Run to execute the pipeline. You will see that the pipeline runs successfully. To confirm the results, you can verify directly in the Data Warehouse to ensure that the tables have been dropped as expected.
Stored Procedure Activity
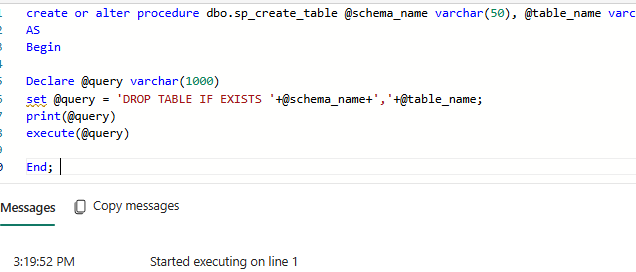
In this stored procedure, we are passing two parameters: SchemaName and TableName. The procedure uses these parameters to dynamically construct and execute a DROP TABLE statement, removing the specified table from the data warehouse. The following is an example of dummy data that can be dynamically dropped by passing the schema and table names from the pipeline, as illustrated above.
The next step is to create a pipeline to call this procedure, and we will pass both the parameters.
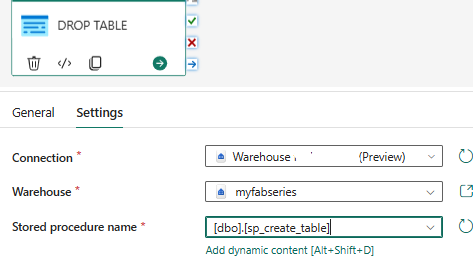
In the pipeline, you can see the Stored Procedure activities listed among the other activities on the canvas.

On the General tab of the activity, provide a name and description for your activity to make it easily identifiable. Then, switch to the Settings tab and select the appropriate connection to your data warehouse. Finally, specify the data warehouse and choose the stored procedure name you want to execute, as illustrated below.
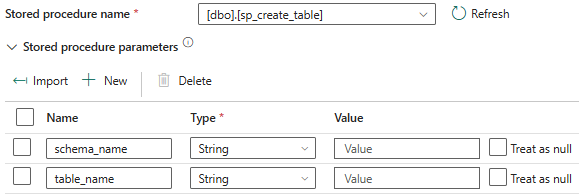
The next step is to import our parameters, first is the schema name: dbo and a table name:
The next step is to validate the data pipeline. Navigate to the Home tab, click Validate to check for any errors or issues, and then save the pipeline. Once it is saved, click on RUN

Our procedure activity ran successfully.
Finally, let’s verify the data in our data warehouse. You can see that the dummy1 table has been successfully dropped, as demonstrated above.
This is a lot to take in. I know.
I hope this walkthrough gave you a clear understanding of how to orchestrate dynamic operations in Fabric pipelines*. If you have any questions, ideas, or want to explore more advanced scenarios like **dynamic table creation, data transformations, or incremental loading*, feel free to *connect with me** Twitter, LinkedIn. I’m happy to help you take your Fabric data pipelines to the next level!*
Additional Resources
Stored Procedures
Data pipeline
Microsoft Learn

